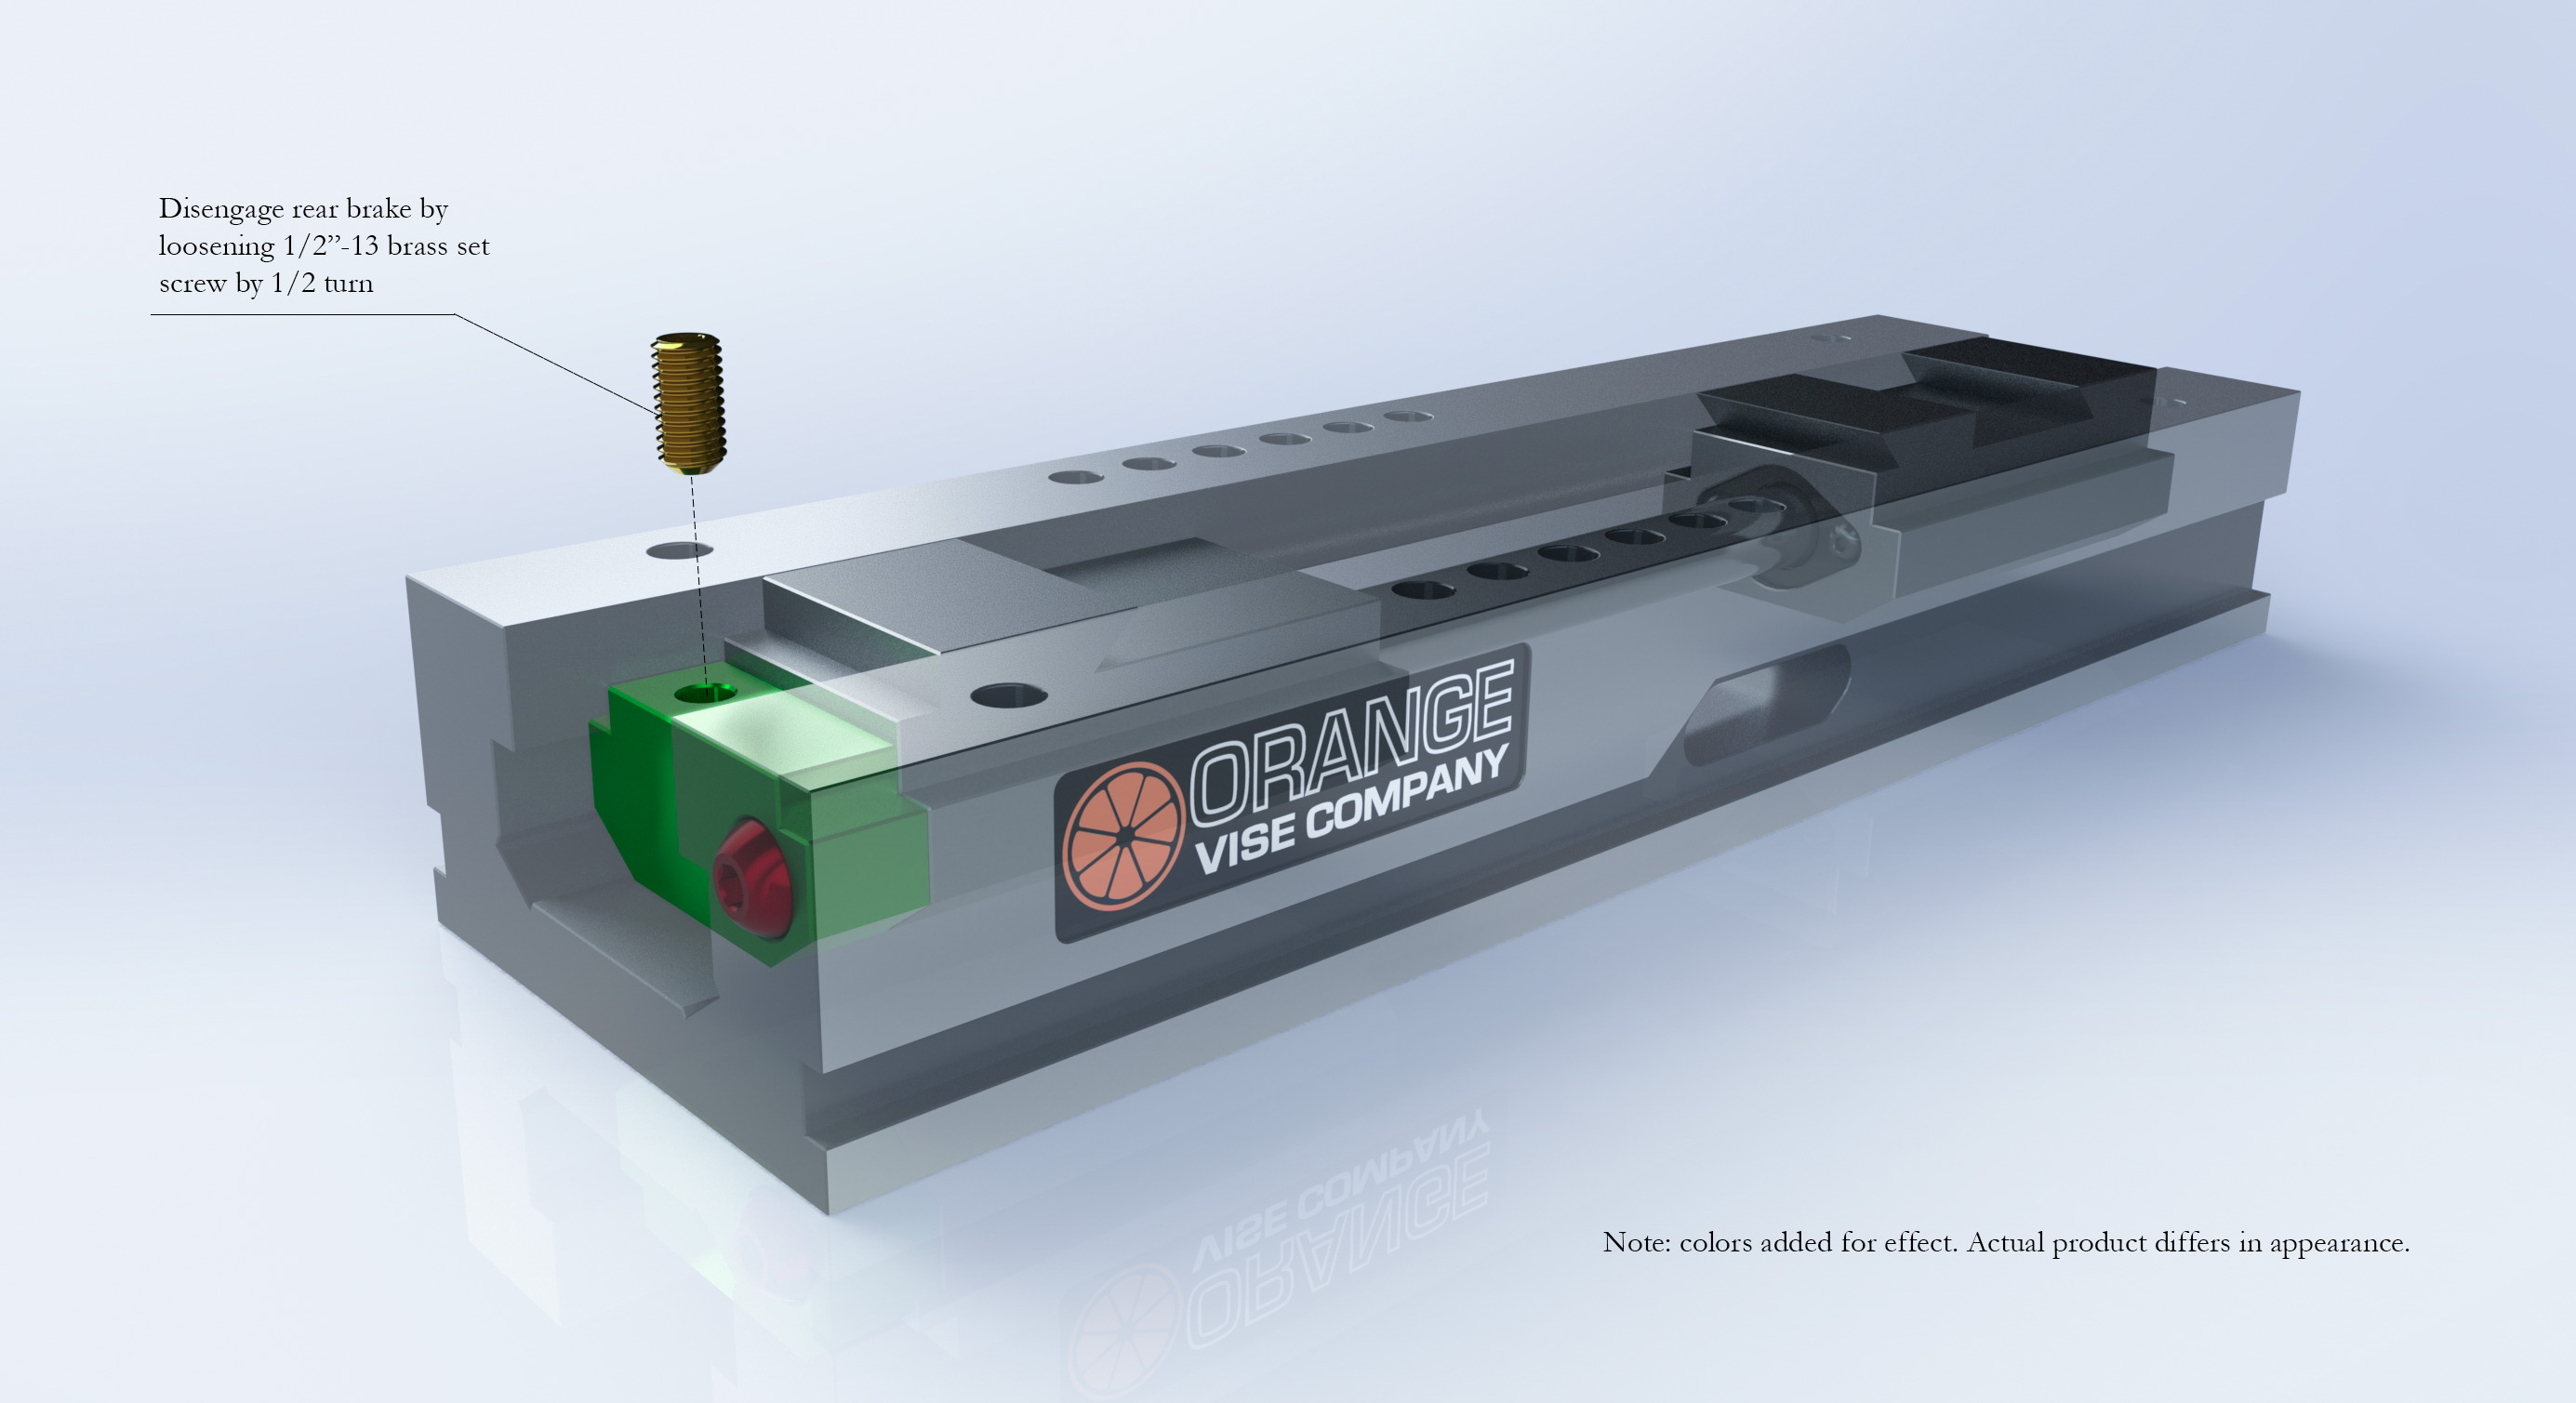
Step 1: Disengage the brake
The brake is a spring-loaded travel limiter for the rear sliding jaw in dual-station operation. The brake is not used in single-station operation.
To start, disengage the brake by loosening the brass 1/2"-13 x 1" set screw by 1/2 turn.
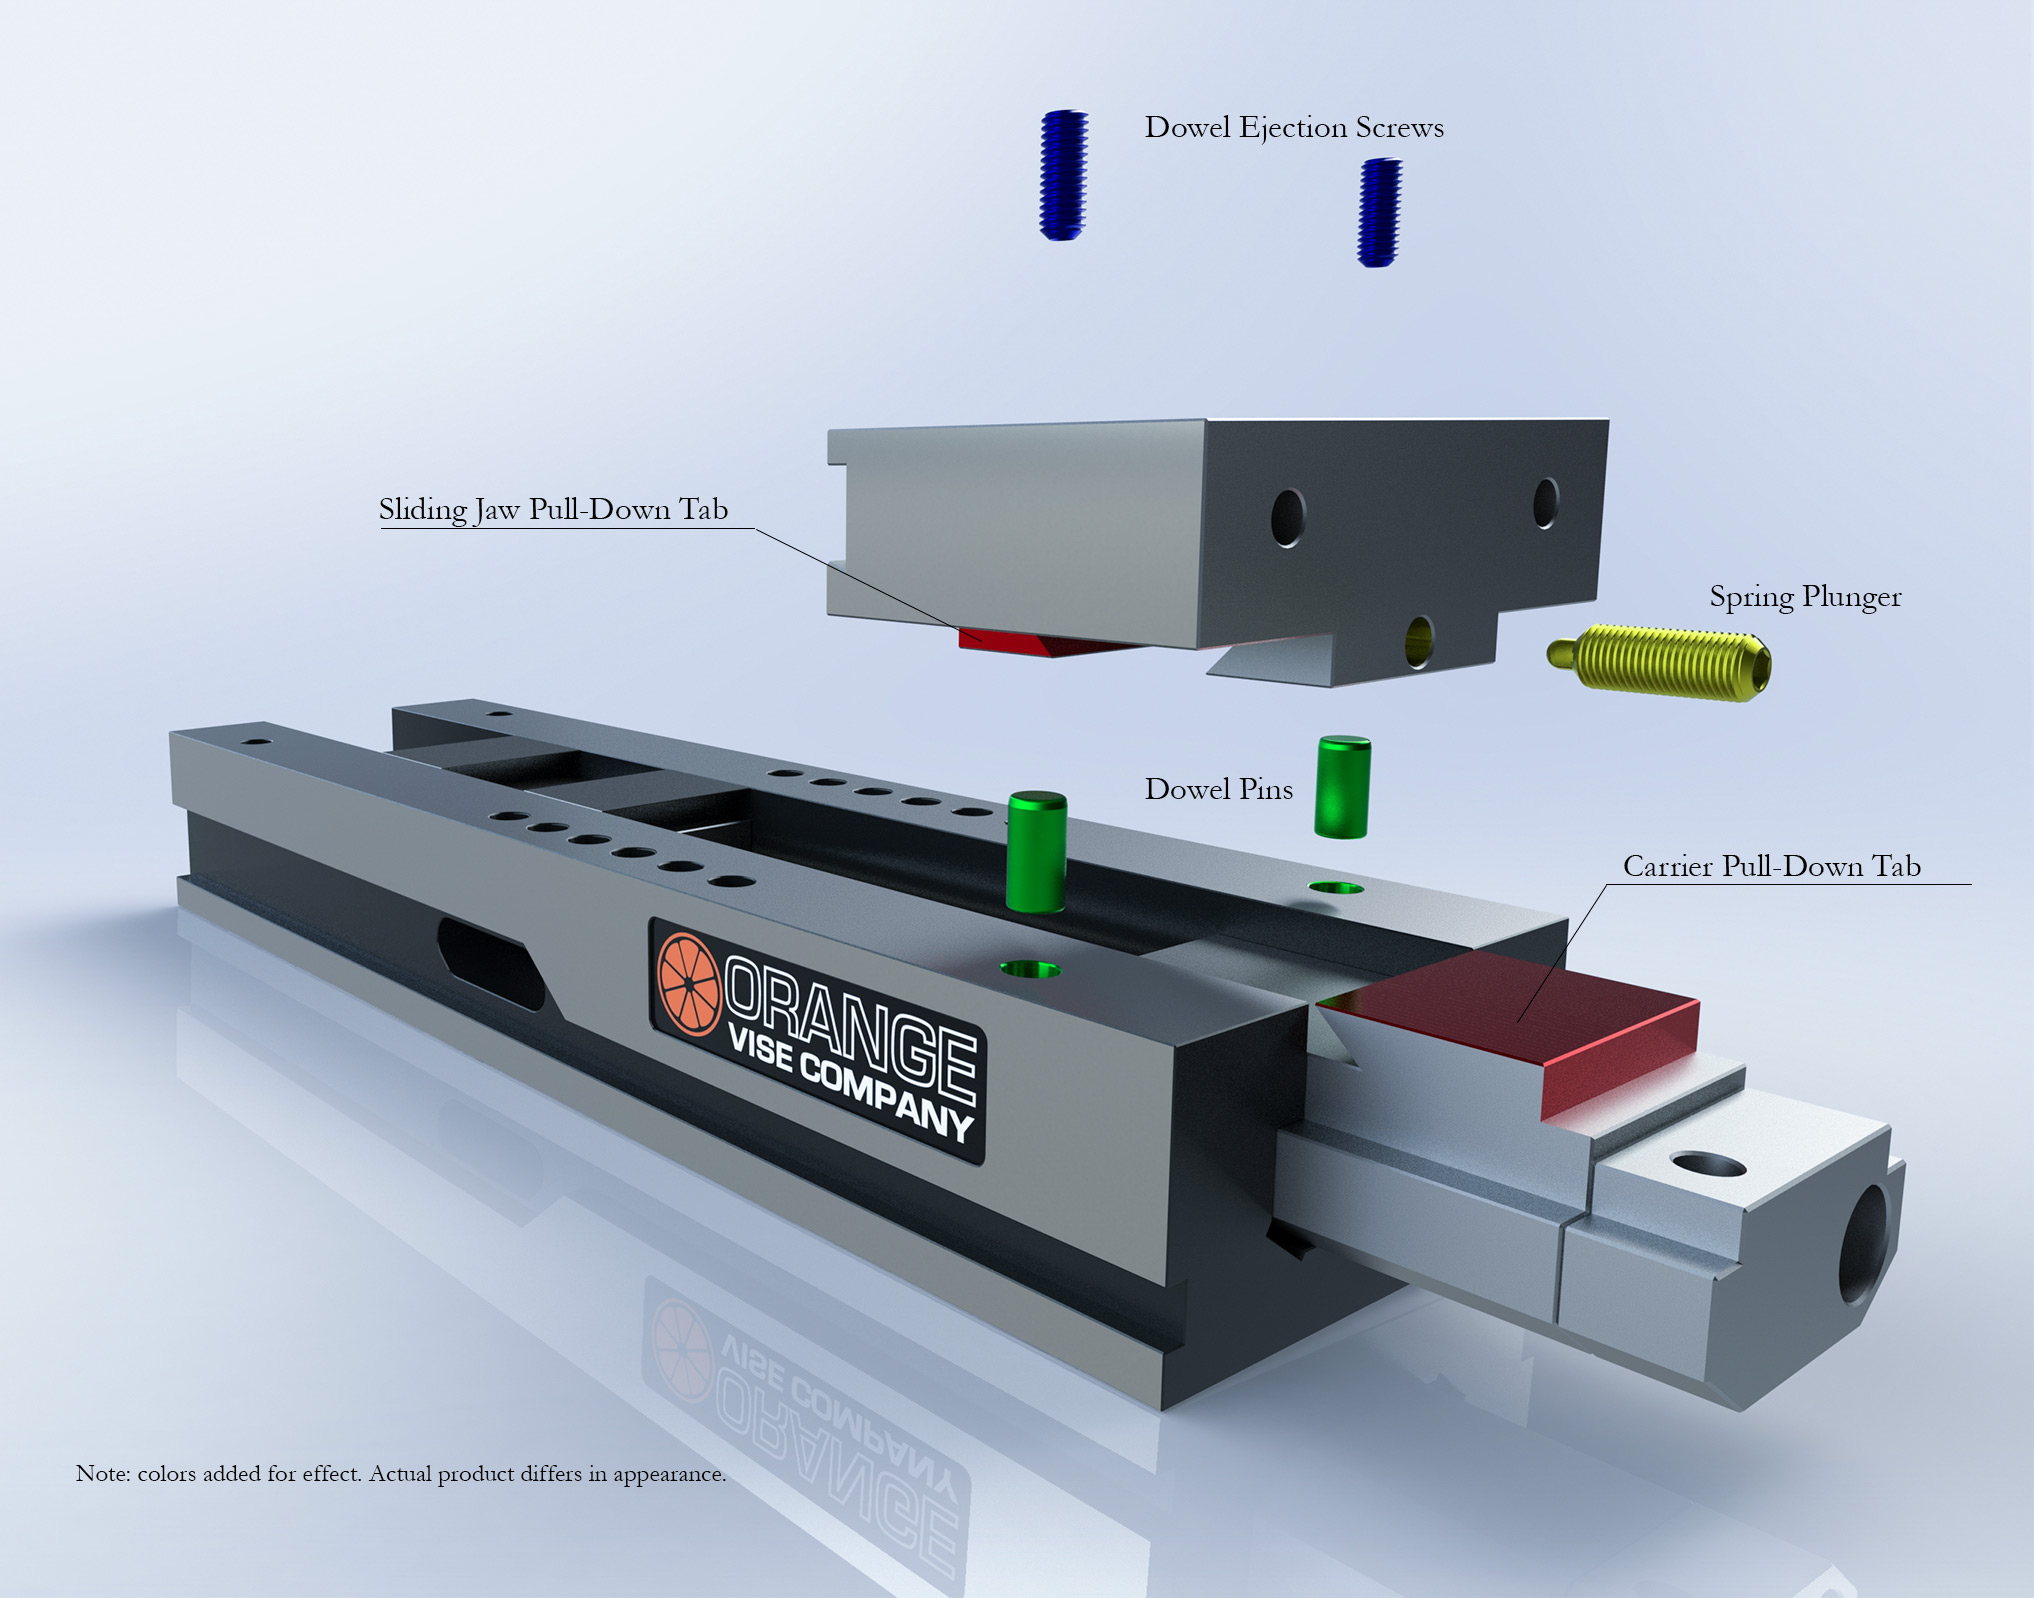
Step 2: Setup the stationary jaw
Locate one of the two sliding jaws (typically the rear jaw) using dowel pins. Align the pull-down tabs on both the sliding jaw and the carrier.
The dowel pin has a tight slip-fit. If the pins bind up during installation, use a rubber pallet and lightly tap the jaw into position.
With the sliding jaw fully seated, torque the spring plunger to 10 ft lbs. The sliding jaw is now fixed in position.
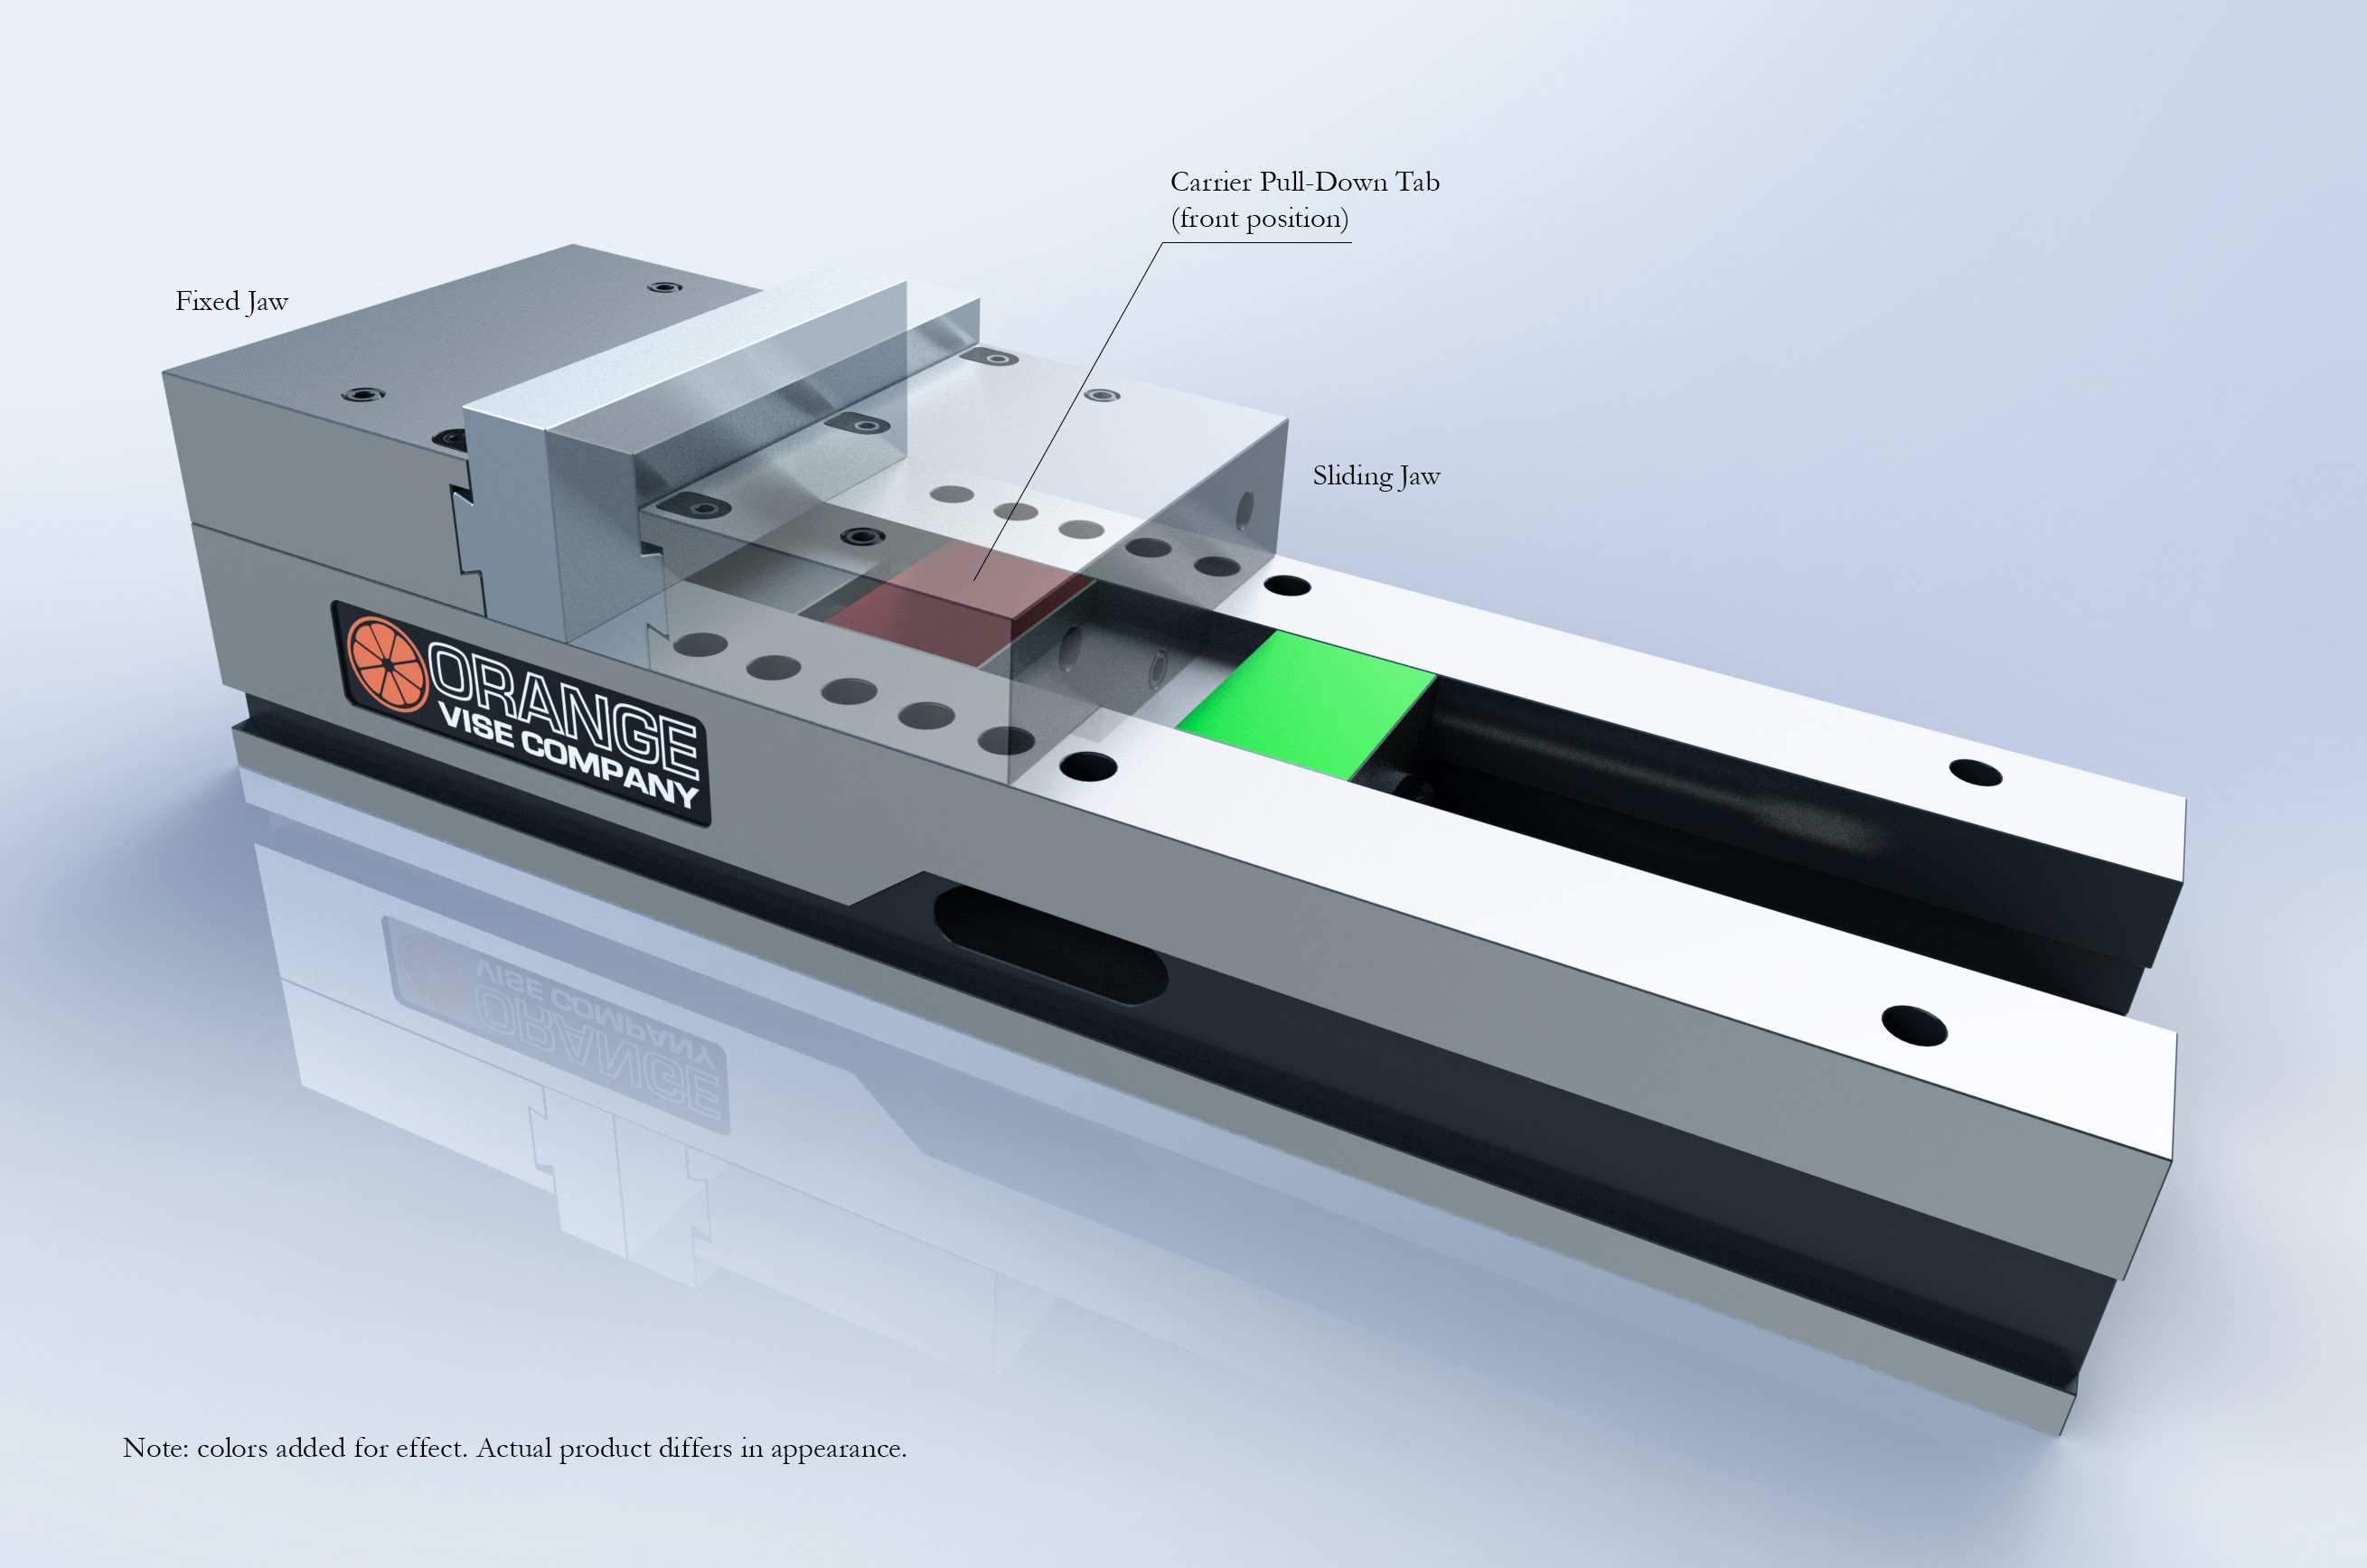
Step 3: Sliding jaw installation
Tighten the spring plunger on the opposite sliding jaw and back off 1/4 turn. This is prevent the sliding jaw from binding during operation.
Use the front position of the front carrier to clamp smaller parts.
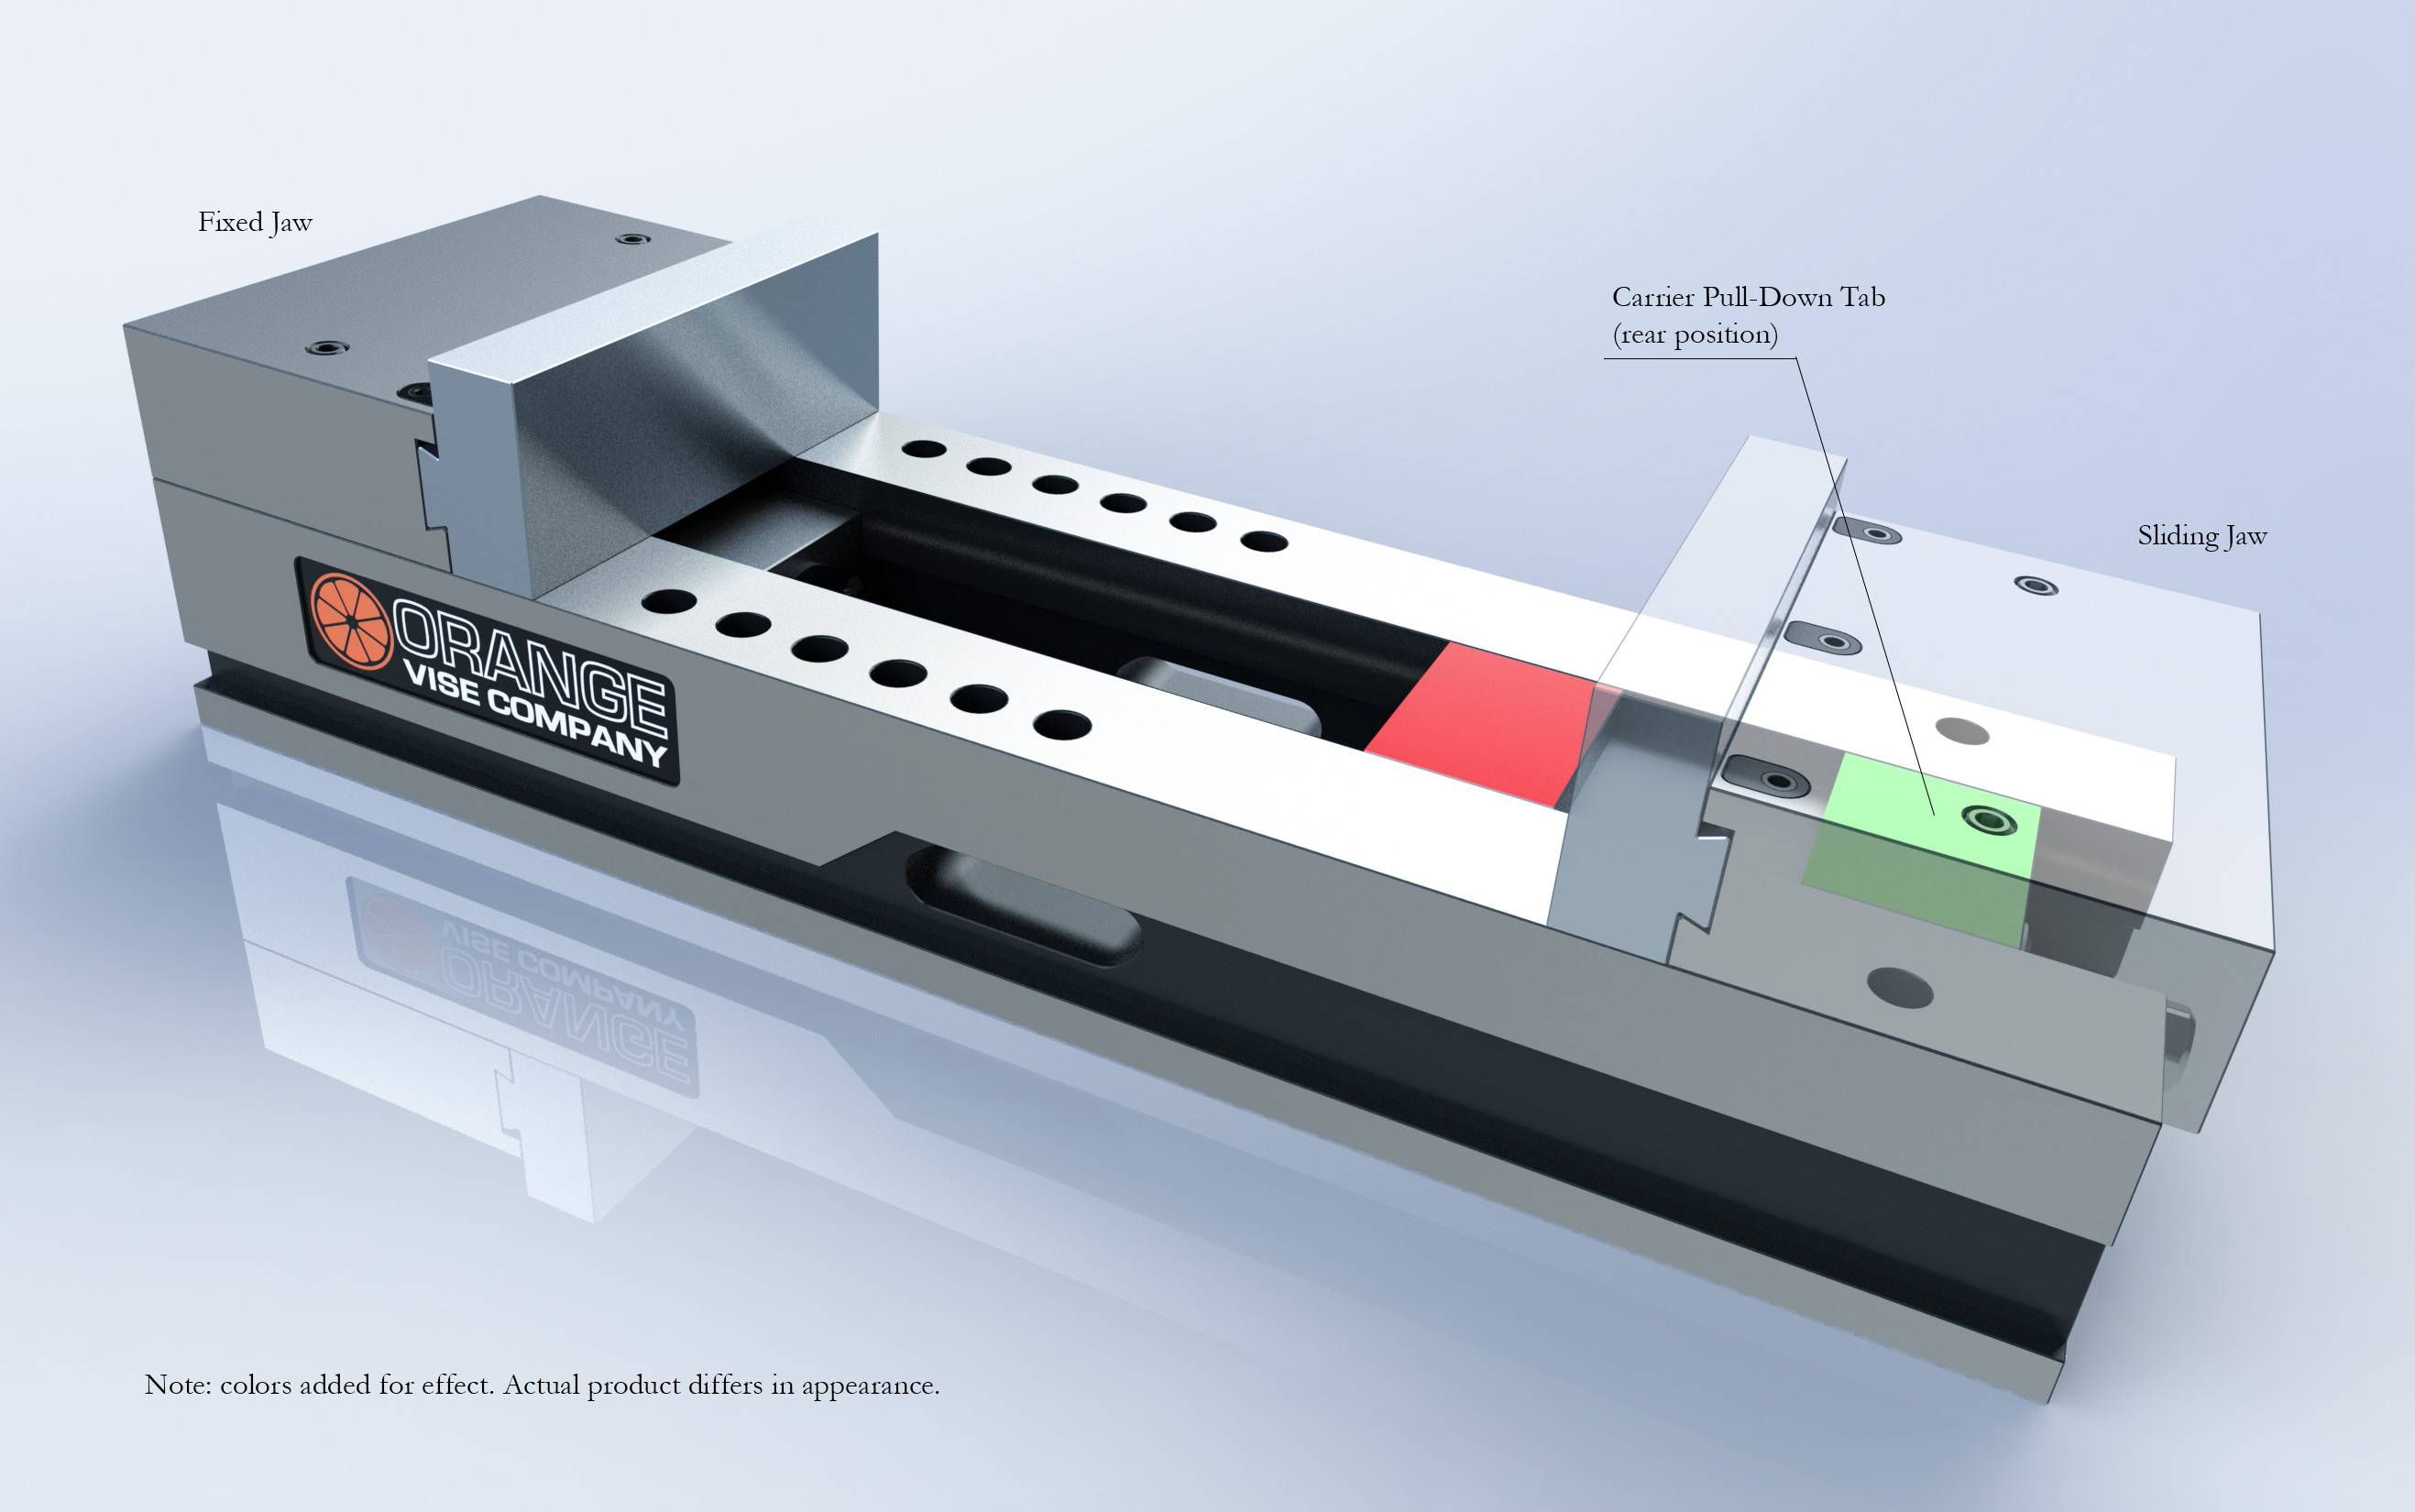
Use the rear position of the front carrier to clamp larger parts. The sliding jaw may hang off the front of the vise body in the fully opened position.
Dissasembly
To disassemble the vise, simply work through these steps in reverse.
Removal of the fixed jaw gets easier with practice. The dowel pin ejection screws can be used to assist, alternating left and right with minimal torque. Excessive torque can damage the sliding jaw.