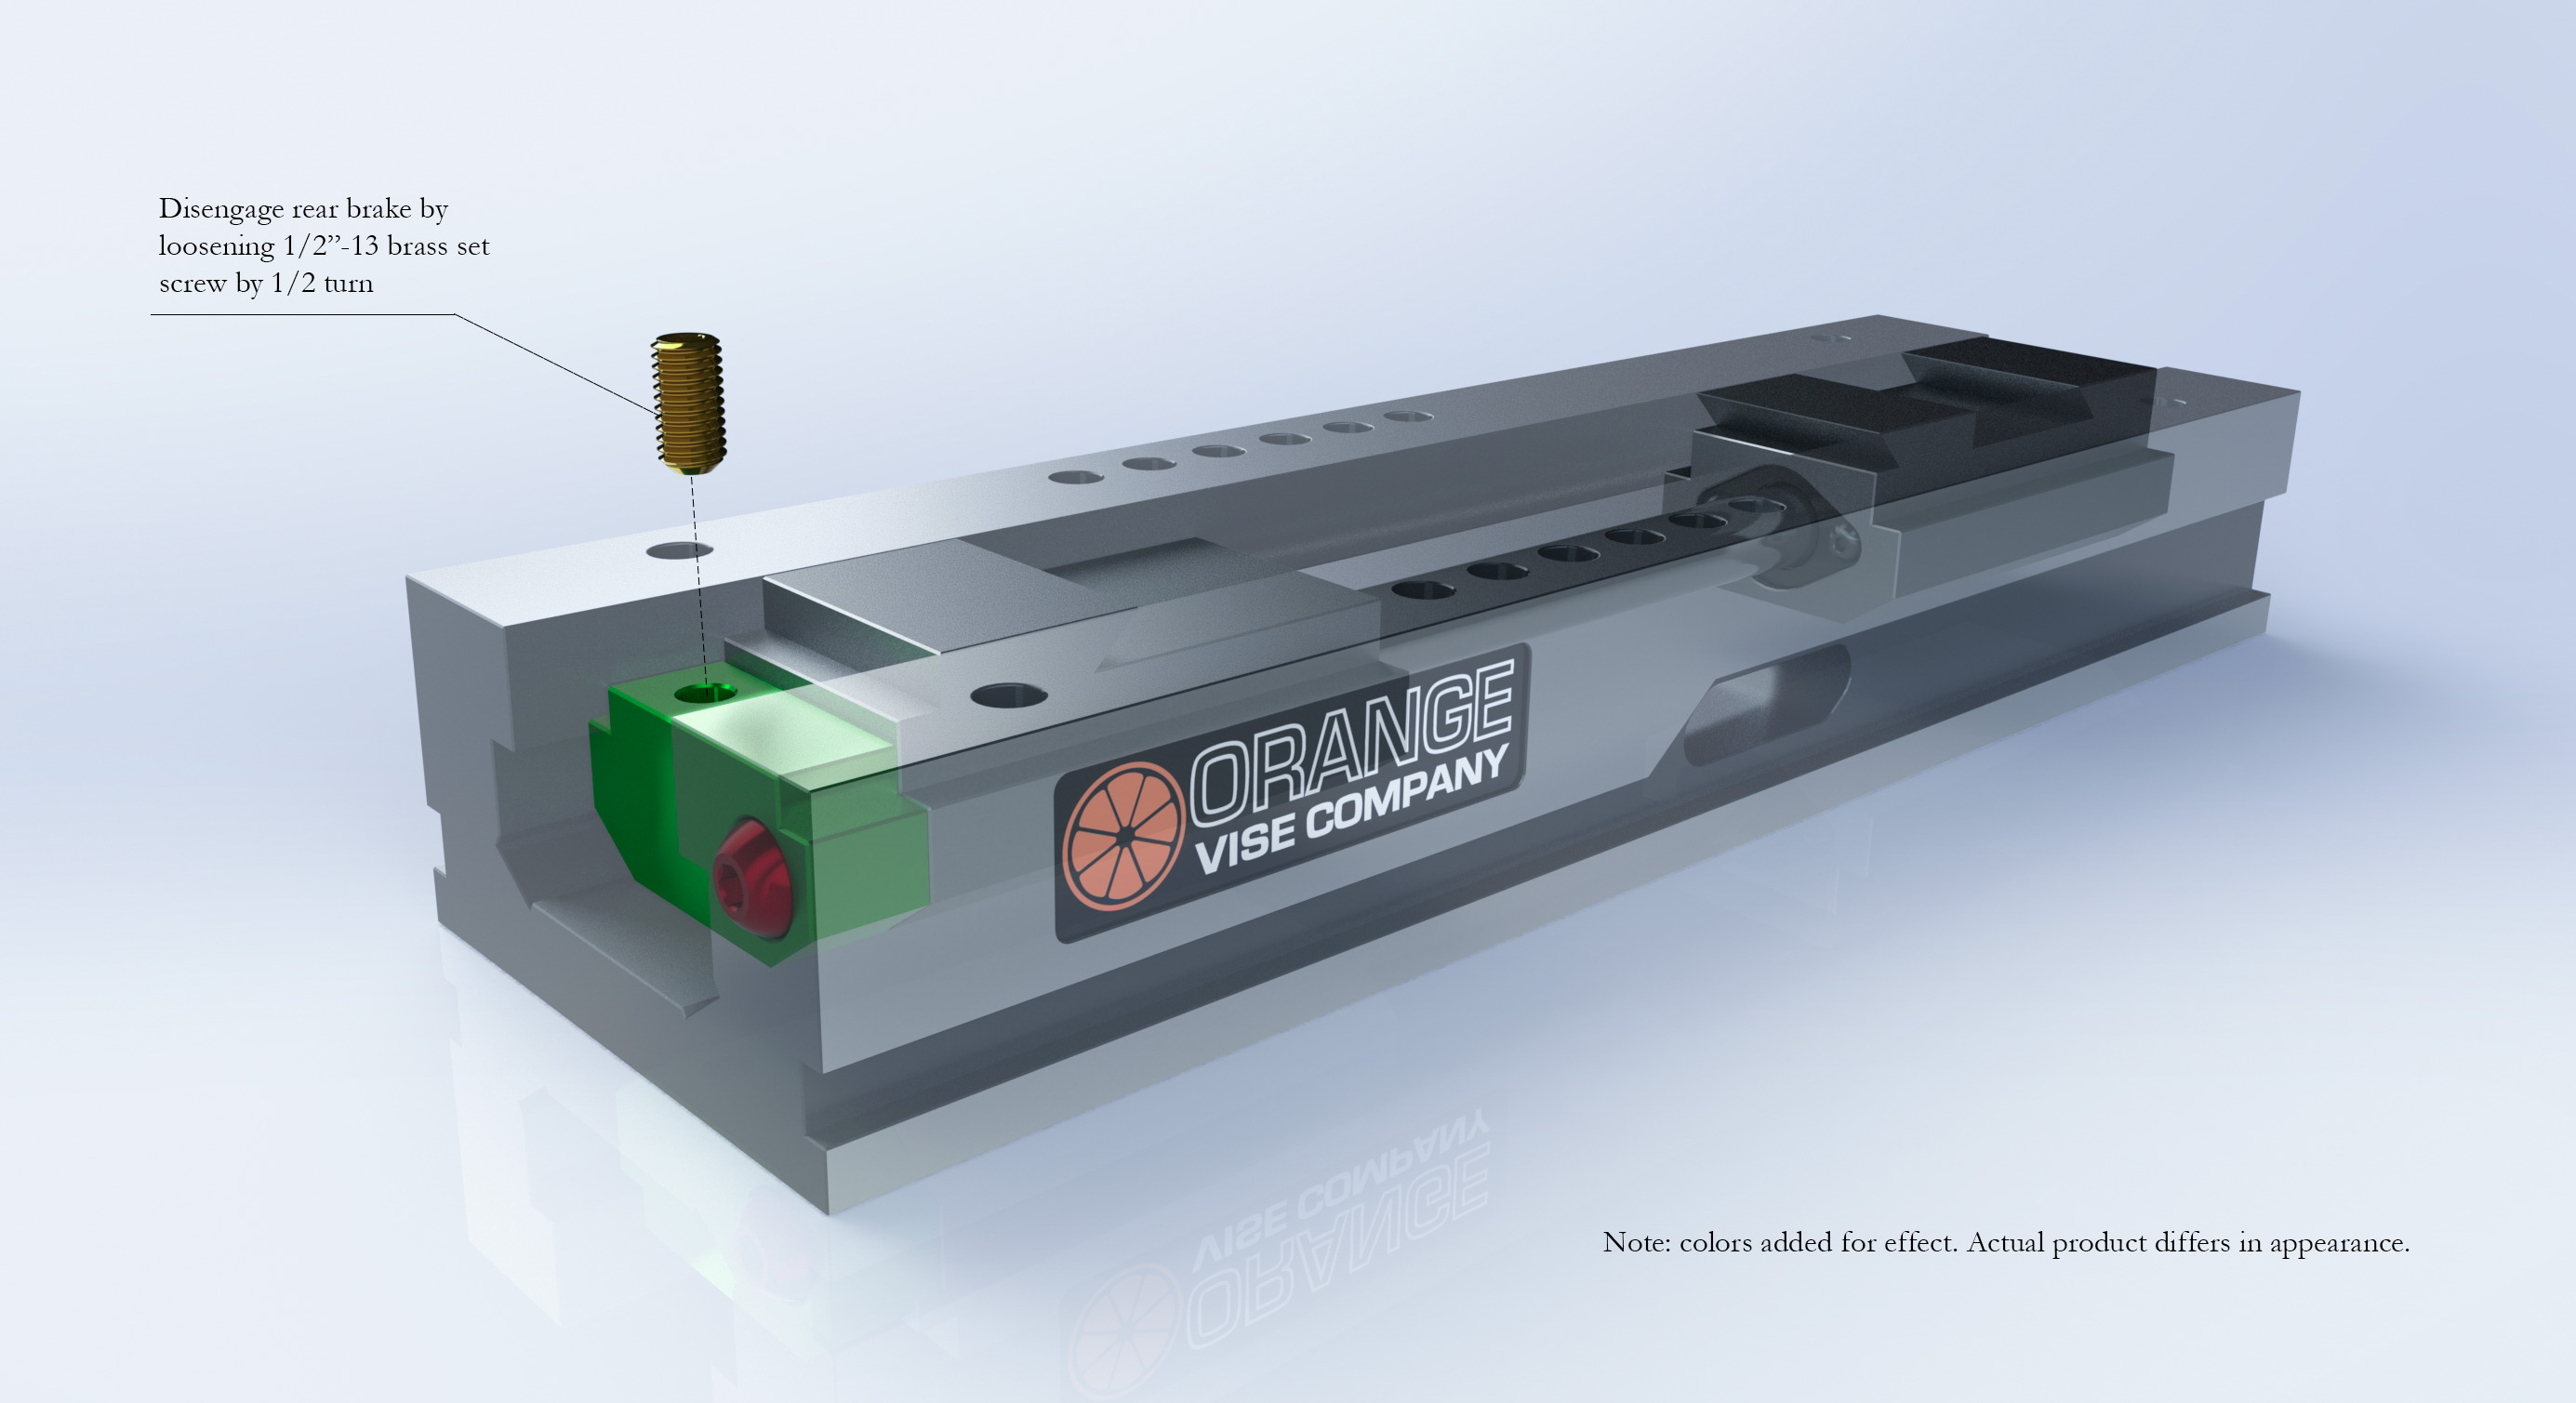
Step 1: Disengage the brake
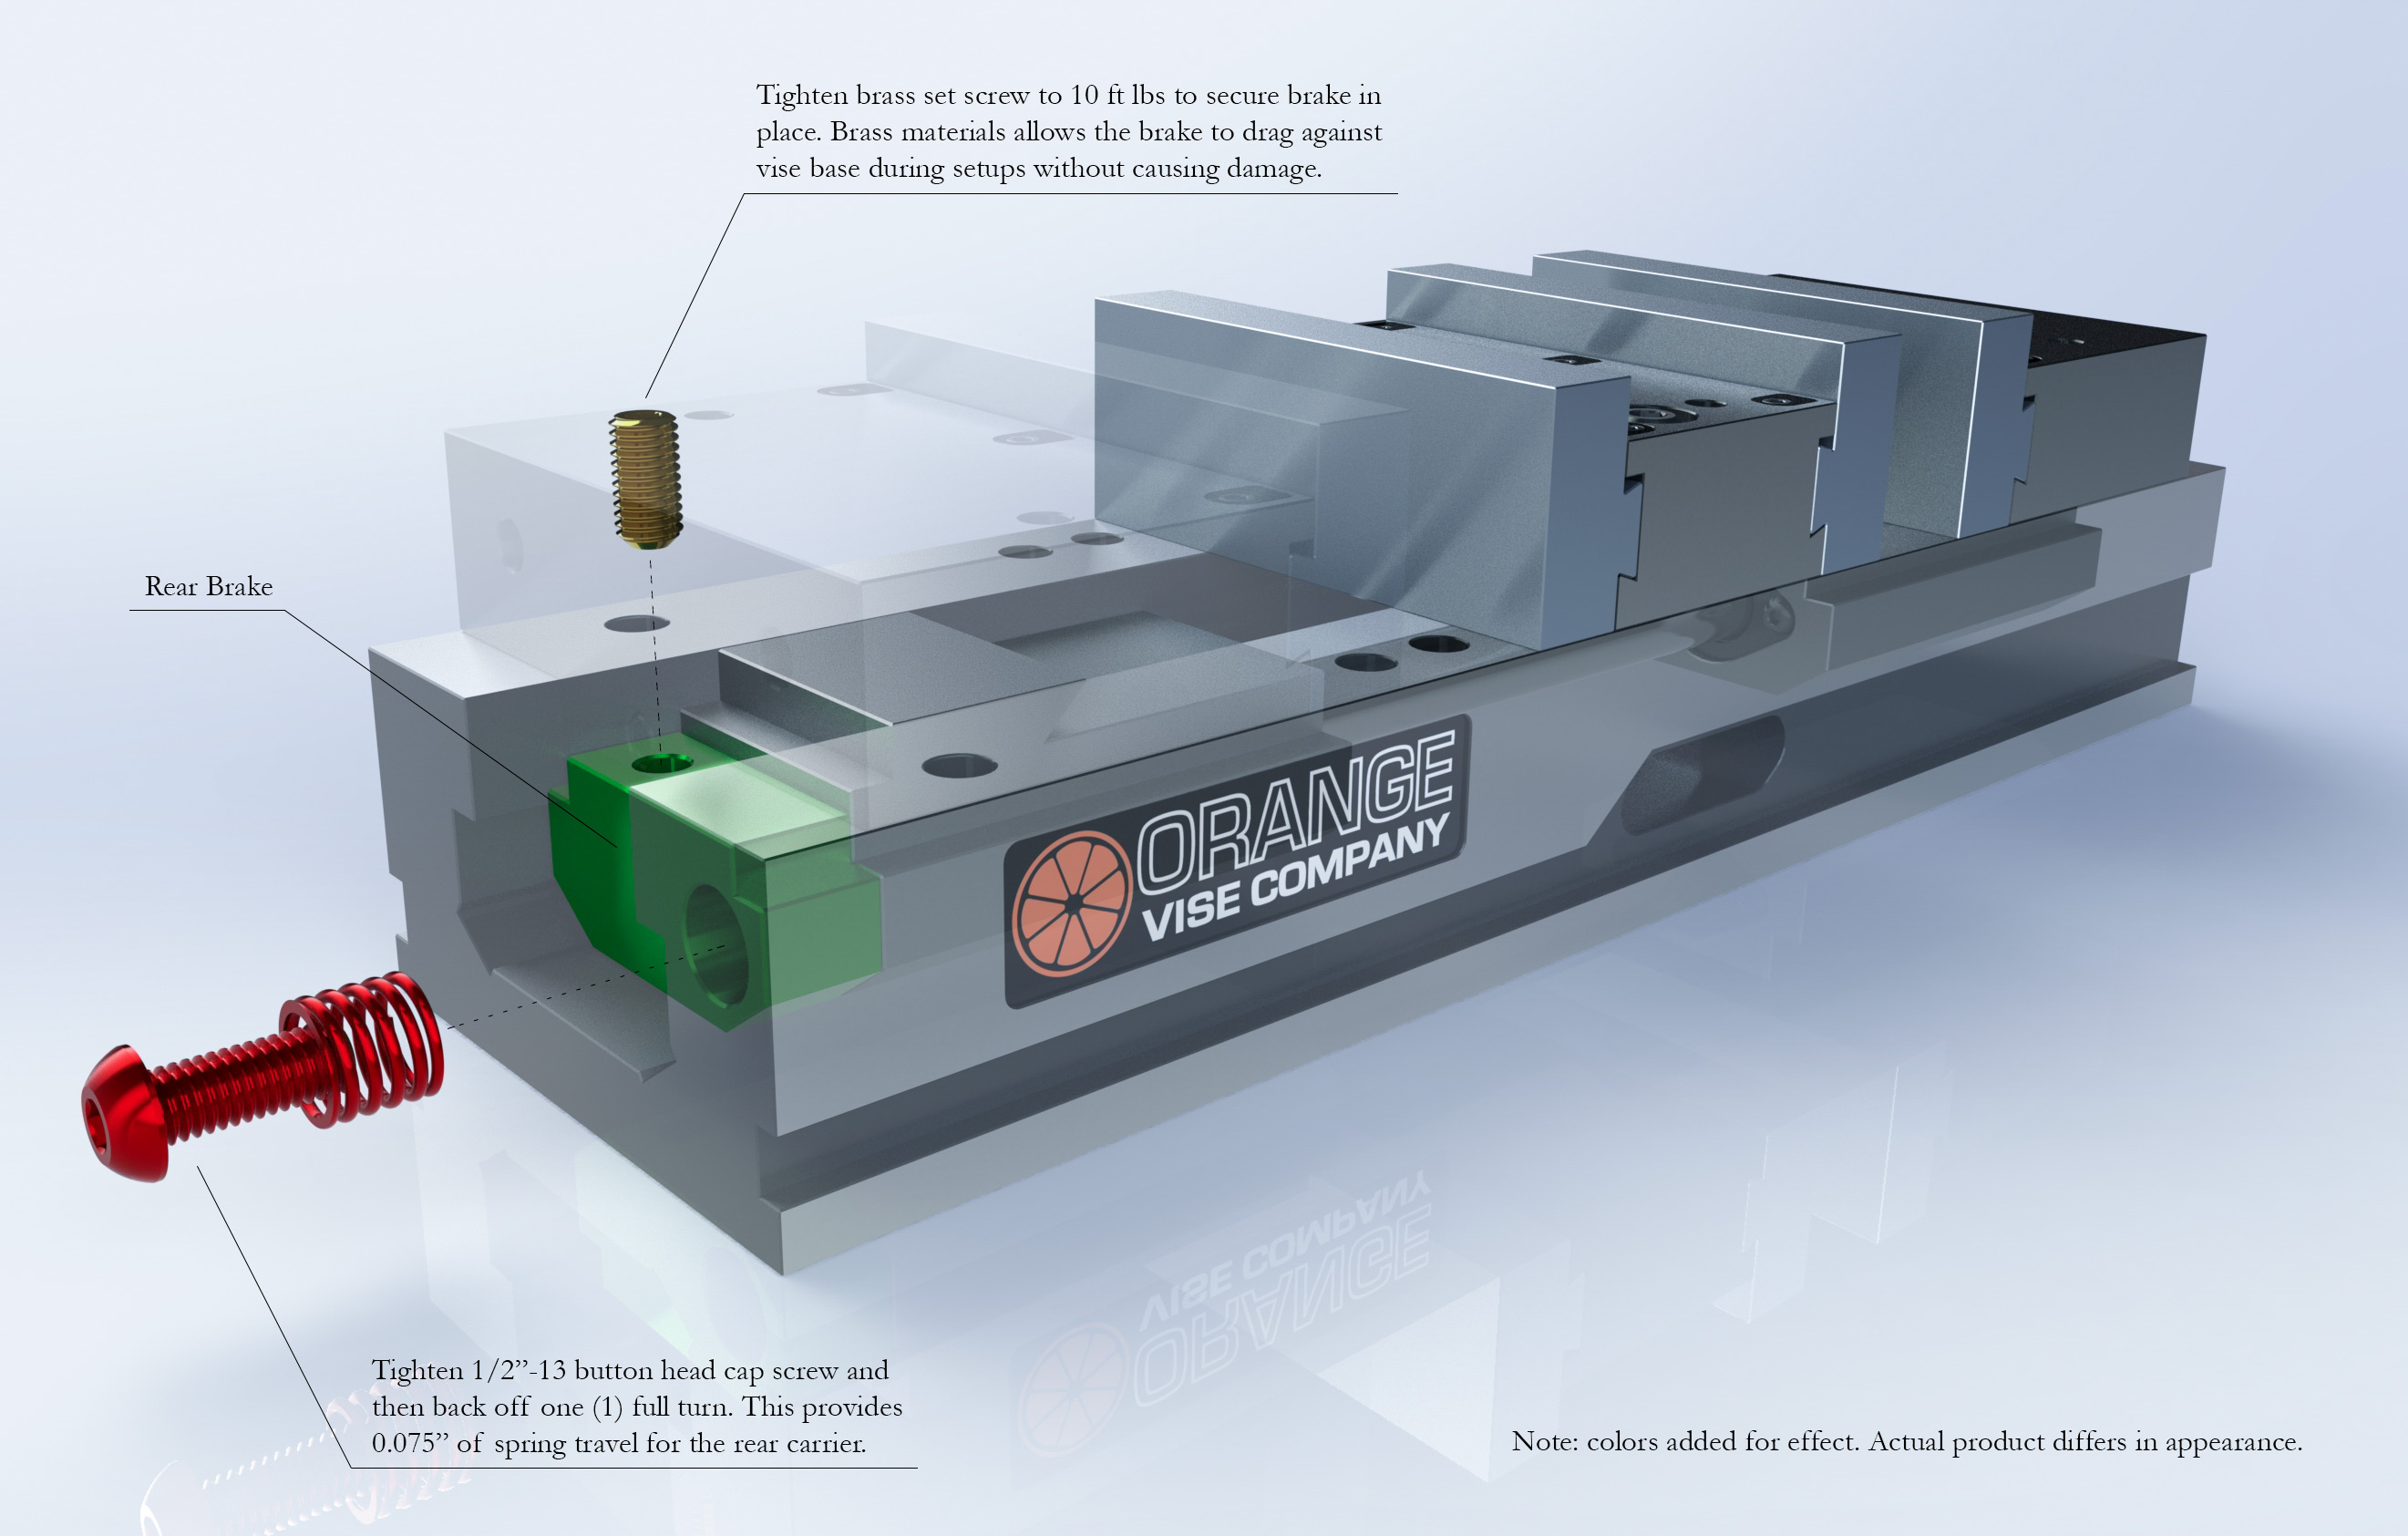
The brake, aka the "third hand mechanism", is a simple spring-loaded stop block that acts as a travel limiter for the rear sliding jaw. To start, disengage the brake by loosening the brass 1/2"-13 x 1" set screw by 1/2 turn.
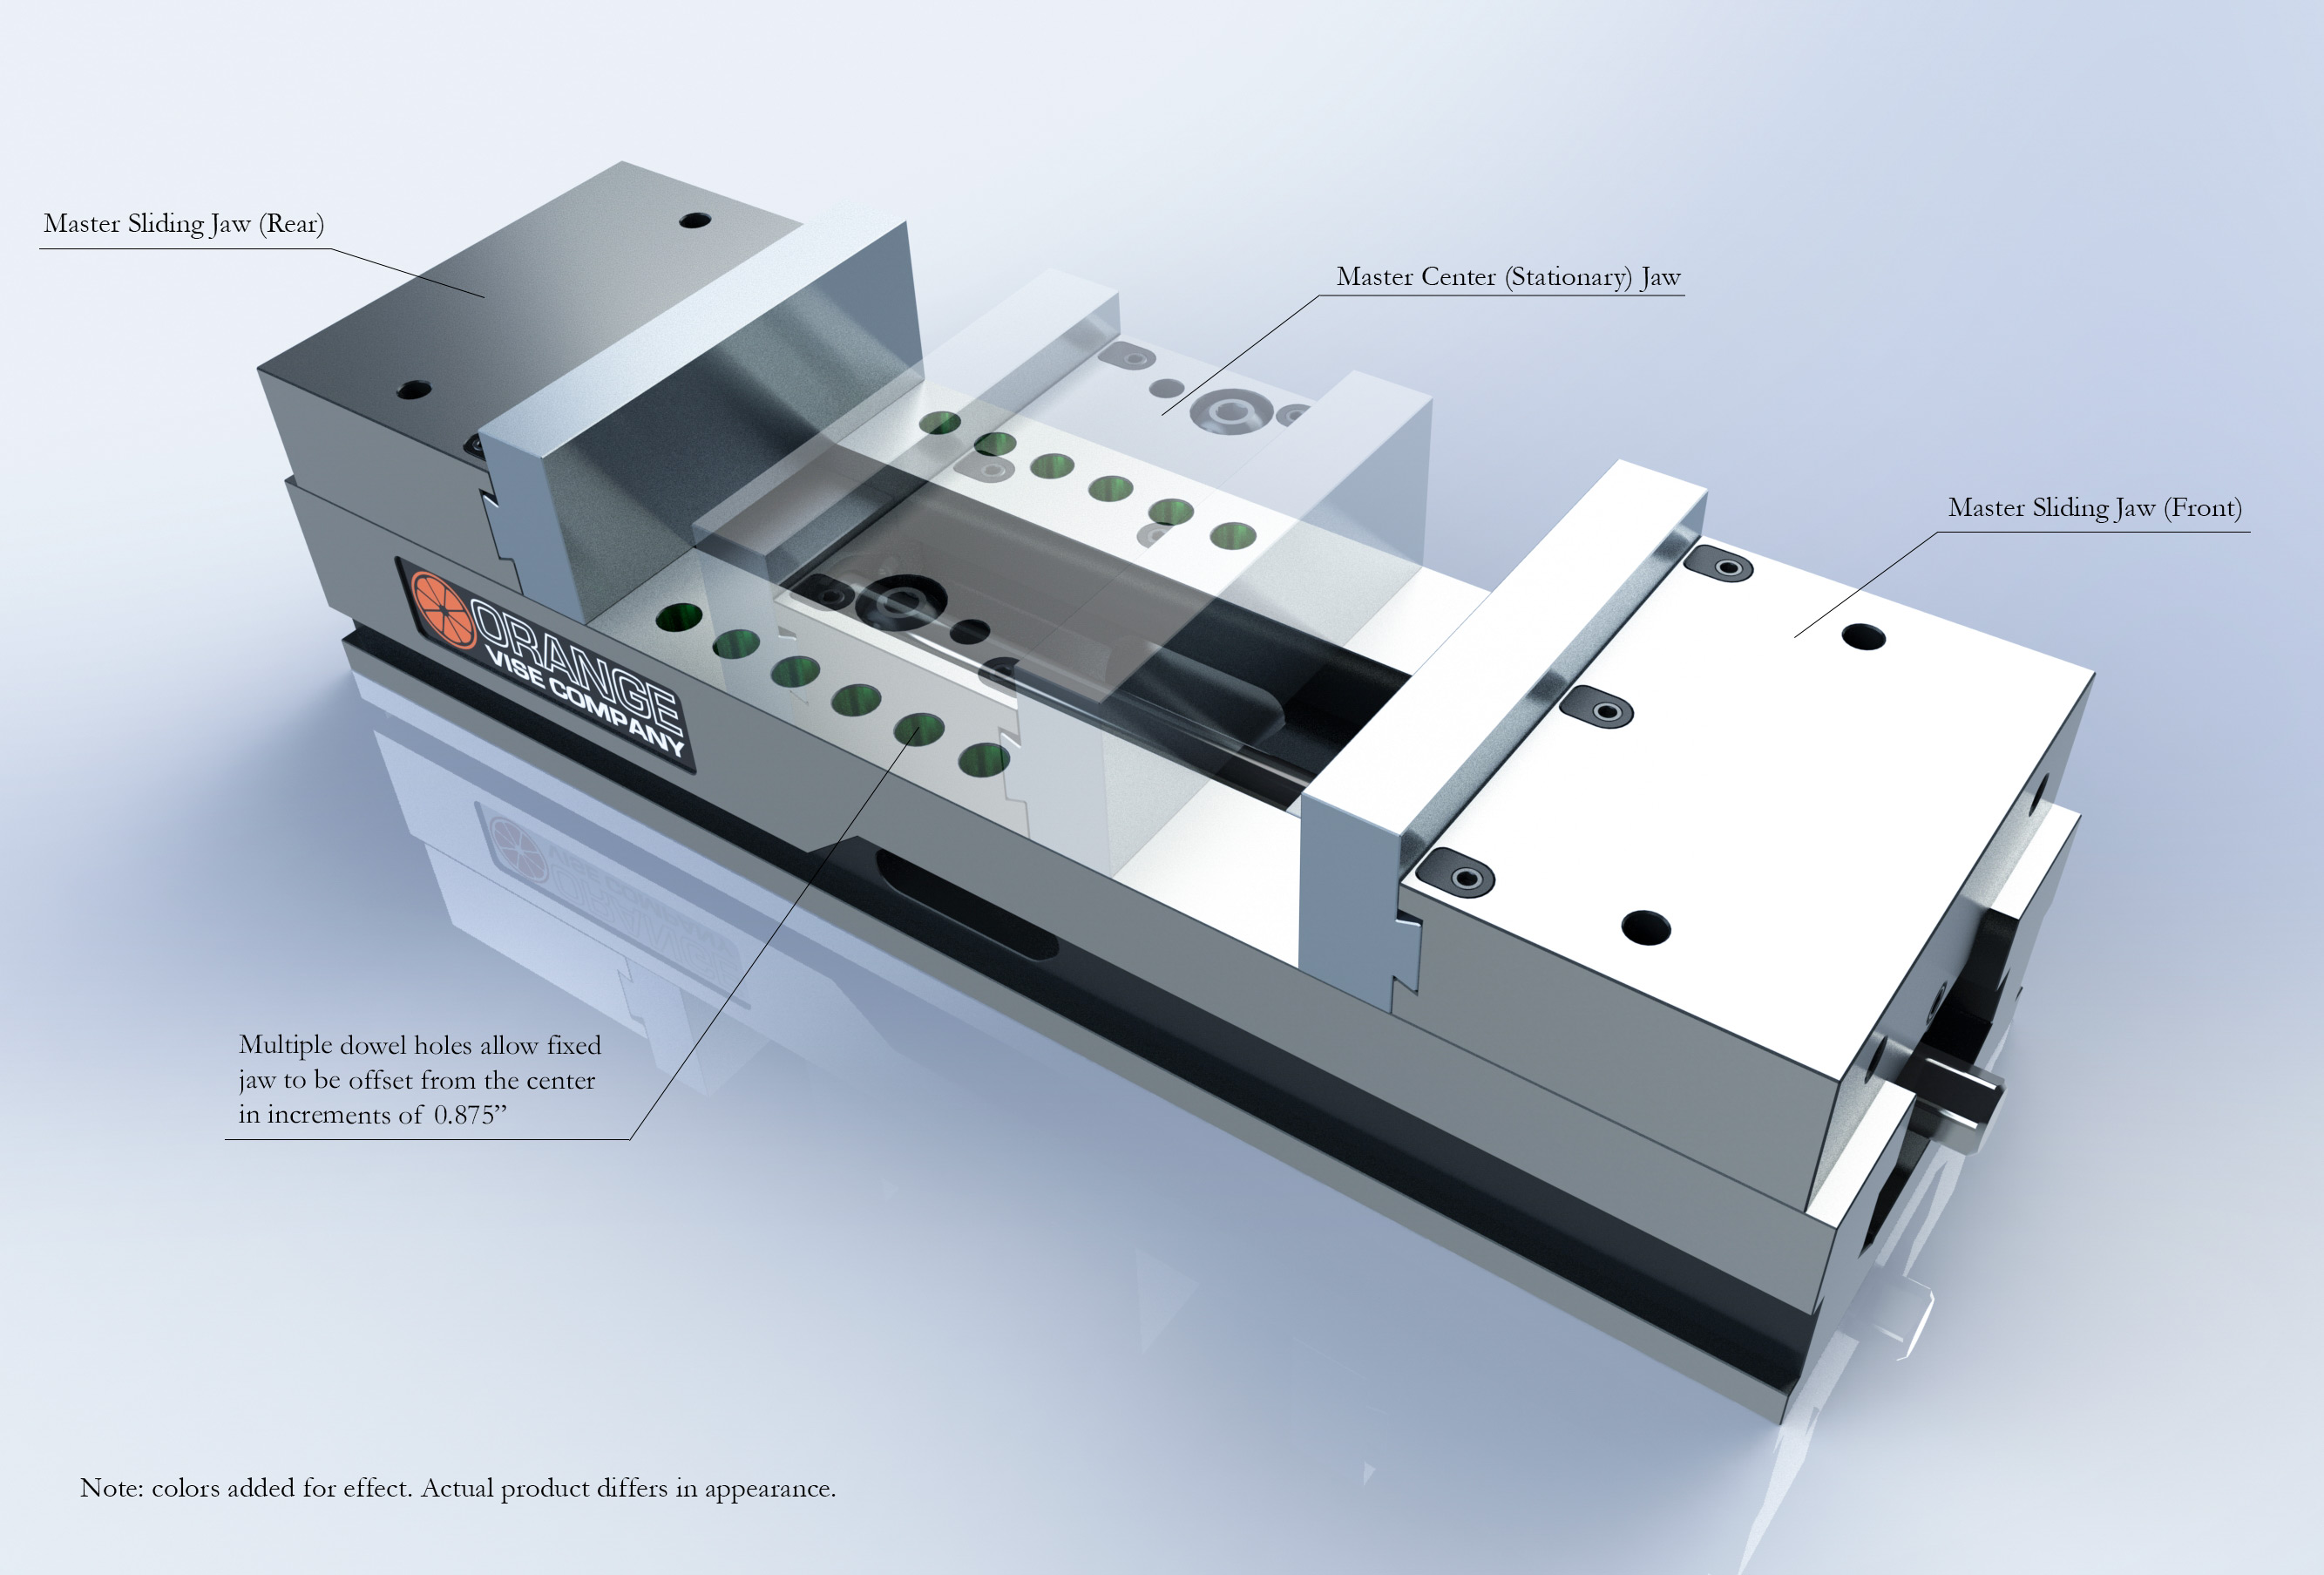
Step 2: Place the jaws on vise the bed
The sliding jaws hook onto the carrier slides.
The center jaw locates to the vise bed using two of the included dowel pins (∅ 0.4993"). Warning: do not use standard off-the-shelf dowel pins, which are typically ∅ 0.5001" - ∅ 0.5003".
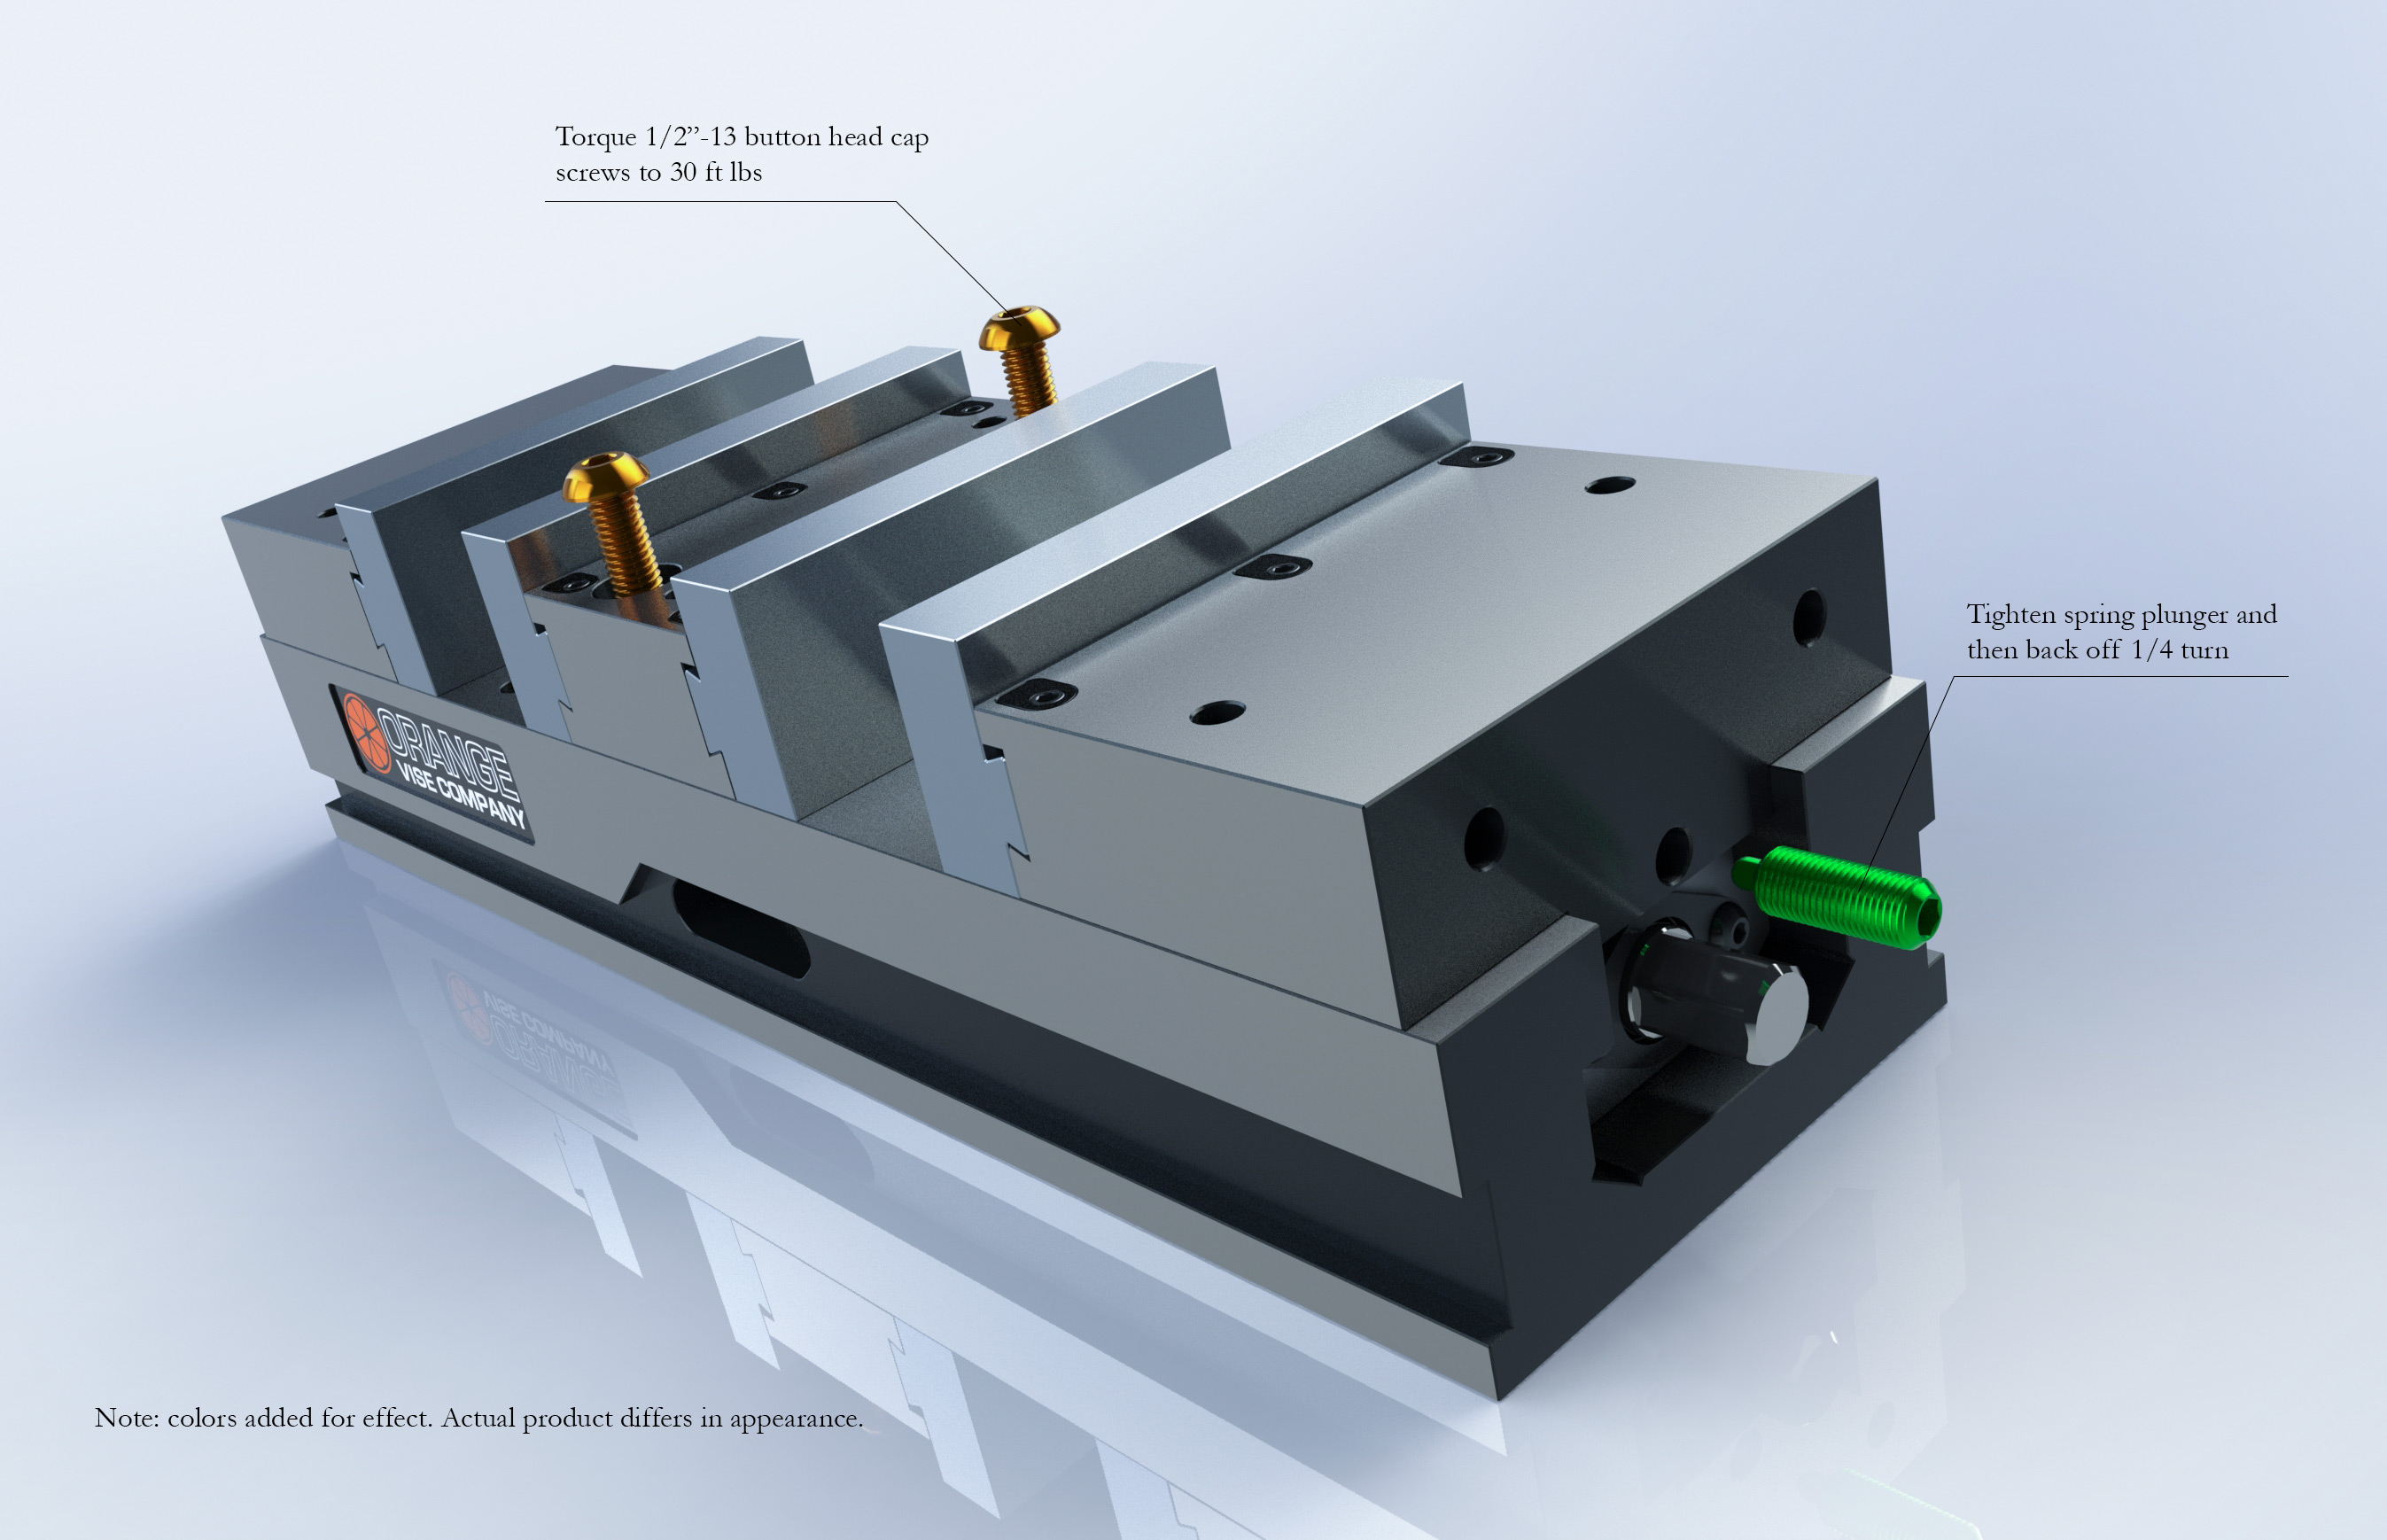
Step 3: Secure the jaws
Secure the center jaw to the vise bed with included screws. The IJS Center Jaw uses 1/2"-13 x 2.25" button head cap screws, while the Hardened Narrow Center Jaw uses 1/2"-13 x 2.25" socket head cap screws.
Secure sliding jaws to the vise bed with the included spring plunger (IJS master sliding jaws) or extended-length set screw (all other sliding jaws). After tightening, back off by 1/8 to 1/4 turn to prevent jaw from binding against the vise bed.
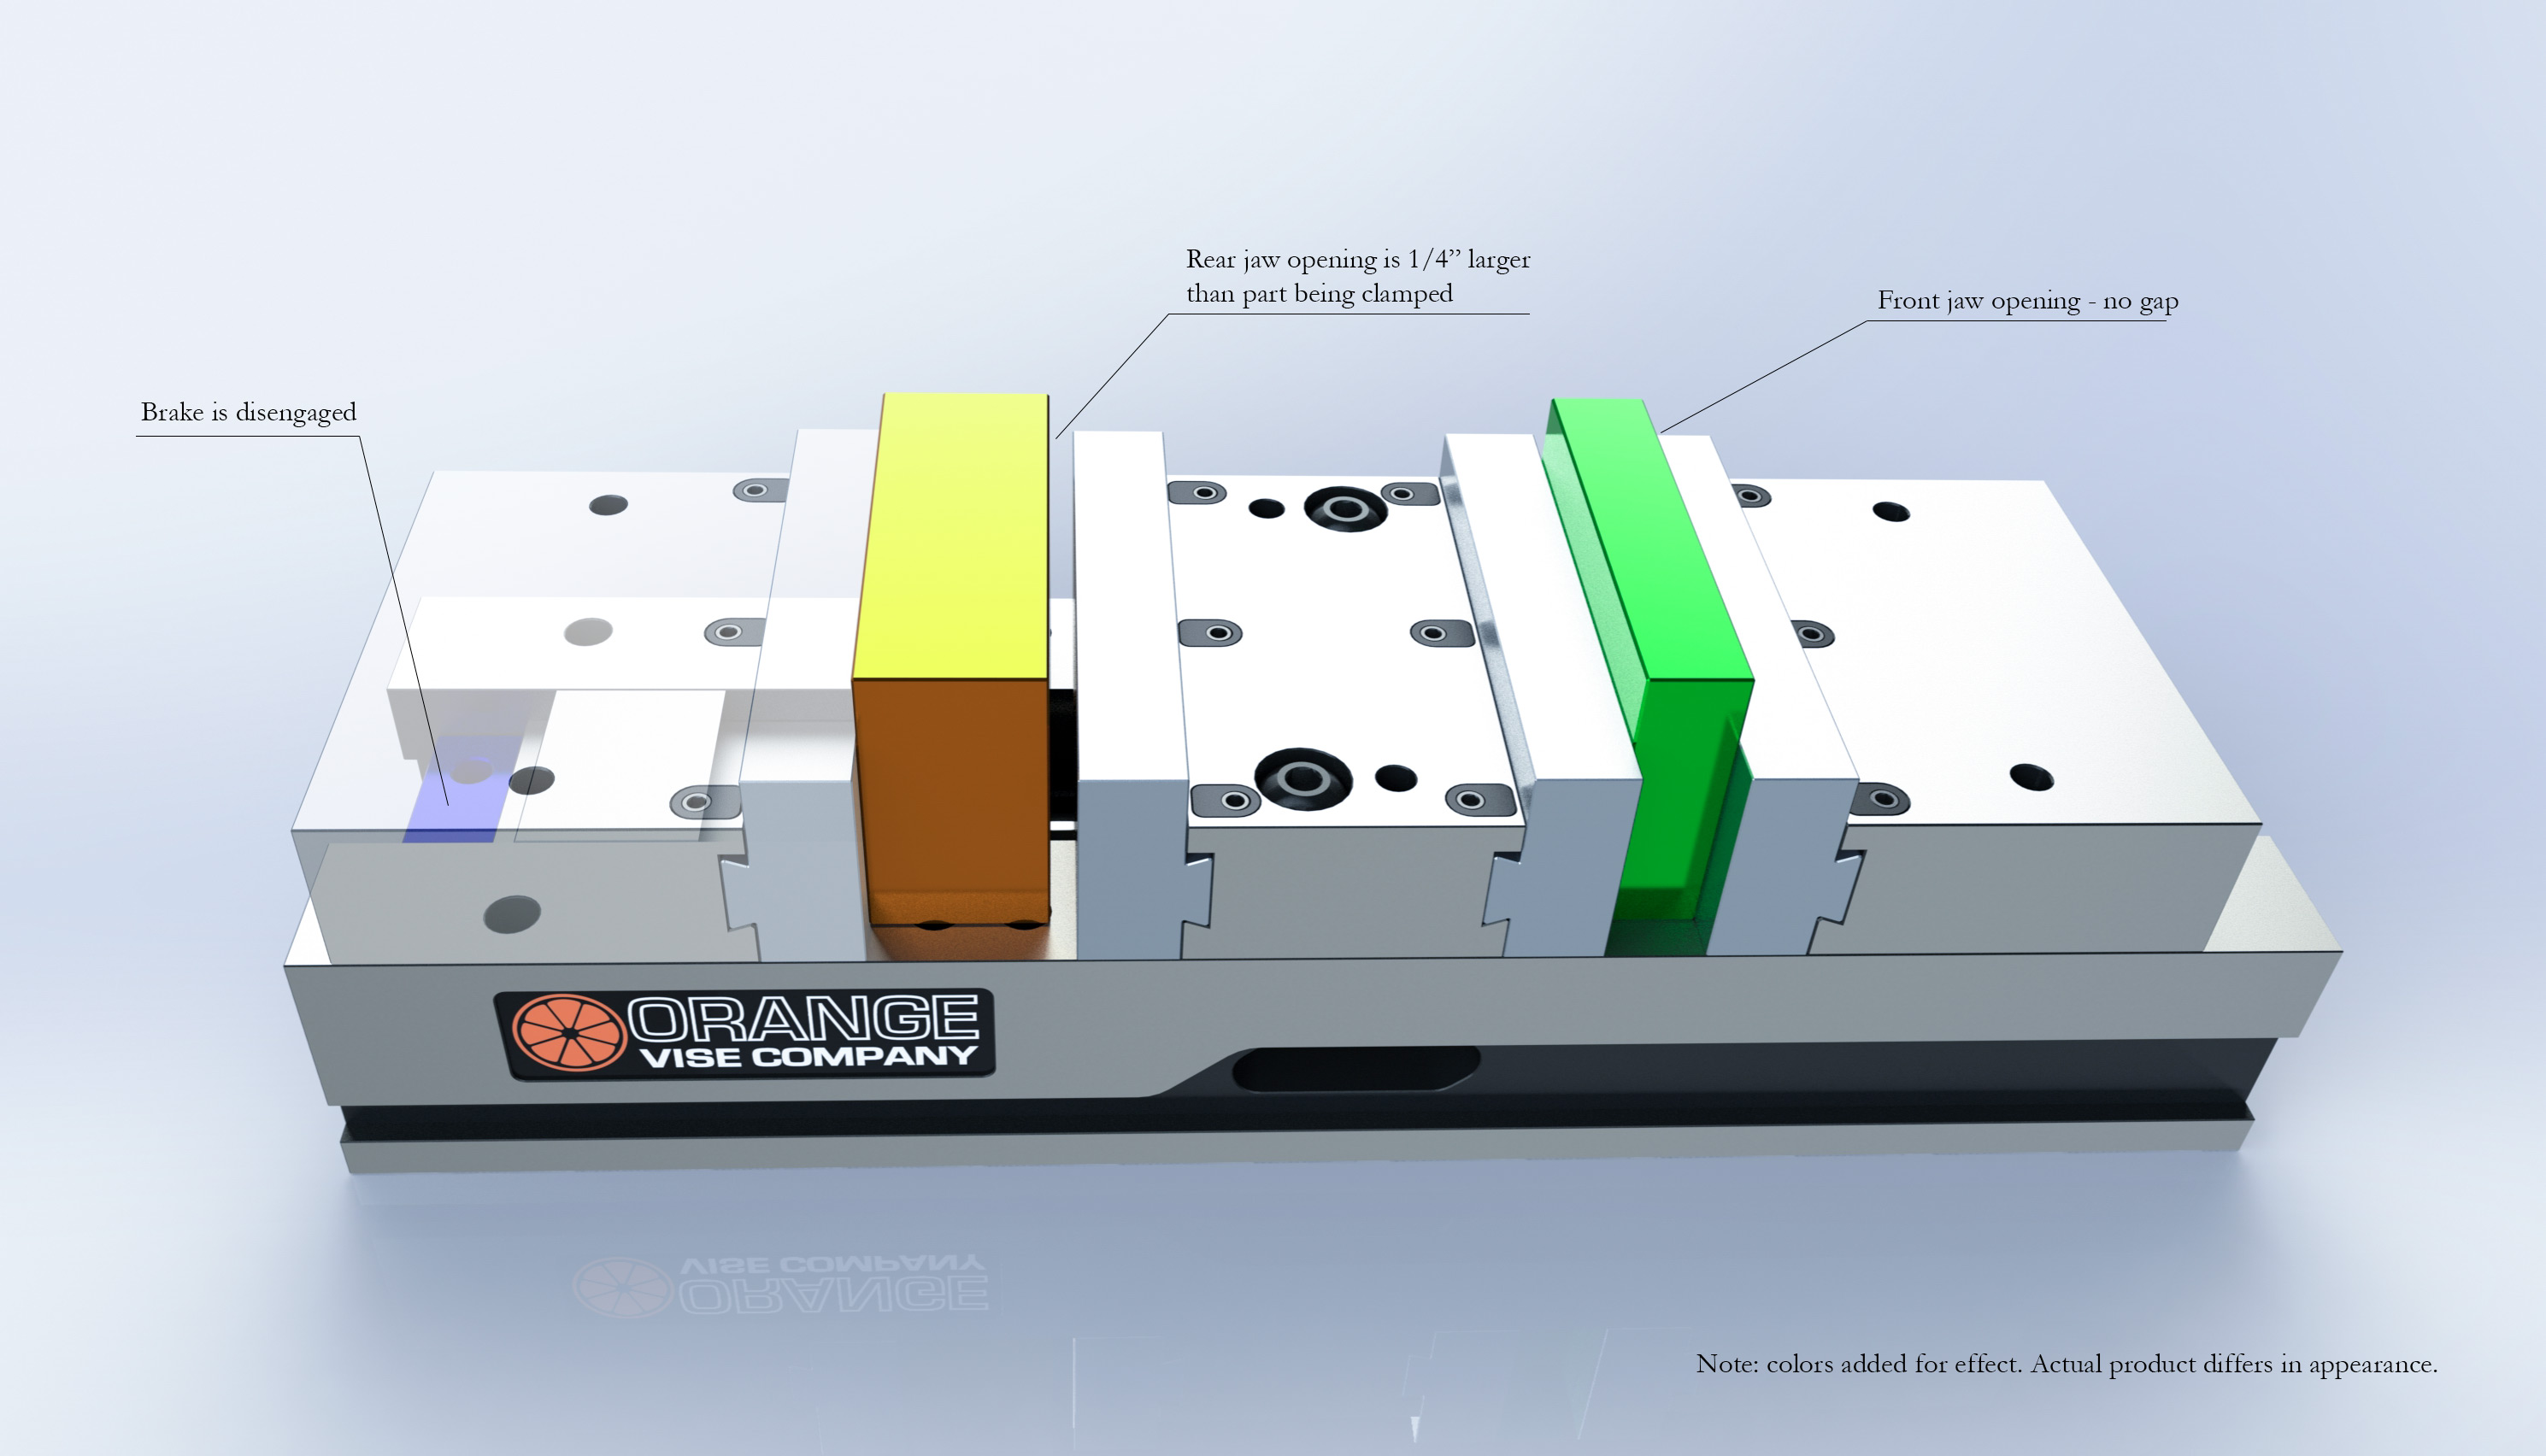
Step 4: Rough position the sliding jaws
Open or close the sliding jaws using a handle of your choice. We do not include vise handles at this time and instead recommend a basic 1/2" ratchet with a 3/4" 6-point socket and appropriate extensions.
For rapid opening and closing, you may use a low-torque, cordless electric impact driver limited to 40 ft lbs or less. Most 18-volt cordless models (designed to drive wood screws) fit this description. Do not use a high-torque impact wrench meant for automotive applications.
Rough position the jaws such that the rear jaw opening is 1/4" larger than the workpiece being clamped. At this stage, the jaws are "floating". If the jaws cannot be slid back and forth by hand, repeat steps #1 and #2.
Step 5: Re-engage the brake
Remove the rear jaw to re-engage the brake. Tighten the brass set screw to 10 ft lbs.
You may also adjust the spring-loaded screw as necessary to increase or decrease spring travel. The factory setting is one (1) full turn backed off. Because the thread is 1/2"-13 TPI, every full turn increases spring travel by 1/13", or 0.075".
The amount of spring travel determines how far the rear jaw will open.
Step 6: Clamp your workpieces
With the brake set, the vise is now ready to use in dual-station operation.
The first time you clamp down on a set of parts, the rear brake will drag against the vise body to set itself to final position and require more torque to tighten. The brake will not drag in subsequent clamping operations.
Spending a few minutes familiarizing yourself with the brake mechanism will greatly enhance the usability of the Orange Vise. Brake adjustment is something that will be done with every setup and will eventually become second nature, requiring only 20-30 seconds to accomplish.